
This how-to with all images including DPLinux.net watermark are under Creative Commons by-nc-sa licence.
Esta página está disponible en español.
Alejandro Cobo López (cc) 2015
Rev. 2.3
![]()
Done until 4.3.1. Working on 5. Last edition: 28th October 2015
NOTE 1: Each section has two categories: procedure/summary and explanation. If you just need remember or copy&paste the commands for a quick configuration, you can follow all steps from procedure section. If you need to know the meaning of some step o parameter, you can read the explanation.
NOTE 2: Each section is independent from the rest. If you have to run an extra operation, you will be referred to the section where it is explained.
NOTE 3: The services are installed just once. If multiple sections ask you for install the same service, you can skip that step.
Table of contents
1. Debian install
1.1. 32 or 64 bits?
Summary
Explanation
1.2. Debian edition
Summary
Explanation
1.3. Installation
Summary
Explanation
2. Basic concepts
2.1. Copy and paste in a window console
2.2. Nano text editor operations
2.3. Log in and log out as root
2.4. Config files and sections
2.5. Router port redirection
2.6. Owners and permissions for files and folders
3. Post-install configs
Summary
Explanarion
3.1. Network set up
Procedure
Explanation
3.1. System update
Procedure
Explanation
3.2. Essential tools install
4. Web services
4.1. Apache web server
Procedure
Explanation
4.1.1. Limit amount of Apache threads
Procedure
Explanation
4.1.2. Virtual hosts
Procedure
Explanation
4.1.3. Enable .htaccess file
Procedure
Explanation
4.1.3.1. Block web page access
4.1.3.2. Move web page address
4.1.3.3. Enable web browser cache
4.1.4. DoS protection
Procedure
Explanation
4.1.5. HTTPS secure web through SSL-RSA
Procedure
Explanation
4.1.6. Password protected web
Procedure
Explanation
4.1.7. AWStats web statistics
Procedure
Explanation
4.2. MariaDB databases (MySQL)
Procedure
Explanation
4.2.1. Console management
Procedure
Explanation
4.2.2. phpMyAdmin management
Procedure
ExplanationExplicación
4.3. PHP
Procedure
Explanation
4.3.1. Increase upload file size limit
Procedure
Explanation
5. CMS install
5.1. WordPress
Procedure
Explanation
5.2. OwnCloud
Procedure
Explanation
5.3. Moodle
Procedure
Explanation
6. P2P files exchange
6.1. BitTorrent (Tansmission)
Procedure
Explanation
6.2. eDonkey2000 (aMule)
Procedure
Explanation
7. Other services
7.1. FTP server
Procedure
Explanation
7.2. Email exchanger
7.2.1. Send emal through a Gmail account
Procedure
Explanation
7.2.2. Send email without Gmail
Procedure
ExplanationExplicación
7.2.3. Send attached file from console
Procedure
Explanation
7.3. File sharing server (SMB)
Procedure
Explanation
7.3.1. Public folder (without password)
7.3.2. Private folder (with password)
8. Server management and monitoring
8.1. SSH remote console
8.1.1. Running graphical applications remotely
Procedure
Explanation
8.1.2. Files and folders management through FISH
8.3. Monitoring with historic (Cacti)
Procedure
Explanation
8.4. Real time monitoring (Linux-Dash)
Procedure
ExplanationExplicación
8.5. Top
8.6. Apachetop
Procedure
Explanation
8.7. Network monitoring (IPTraf)
8.8. IP ban
Procedure
Explanation
8.9. Suspicious behaviour IPs ban (fail2ban)
Procedure
Explanation
9. References
1. Inslling Debian
First of all we have to install Debian. For that, we have to download a disk image but there are several alternatives.
1.1. 32 or 64 bits?
Summary
Install 32 bits version even if you have more than 4 Gb of RAM.
Explanation
This is a good question. The quick answer is: if you have less than 4 Gb of RAM, use 32 bits and if you have 4 more than 4 Gb install 64 bits version. Technically this answer is no wrong but it is too simple. Some environments can offer a better performance with less than 4 Gb of RAM and a 64 bits system. For example, there are several evidences of a significan performance improve in video codification using a 64 bits system instead of 32 bits. Sometimes (like this time) in a system with at least 4 Gb of RAM, a 32 bits OS can offer a better result.
Somebody may wonder if it makes sense to use a 32 bits OS in a machine with more than 4Gb of RAM since 32 bits memory addresses just can access to 4 Gb of memory. For a long time, all x86 CPUs includes a feature called PAE (Physical Address Extension). With this technique, a CPU working witch 32 bits addresses can address up to 64 Gb of RAM. Obviously it is not «for free» because we cannot run threads that fills more than 4Gb, so if your thread need more memory, it won’t be able to access to it.
Once we have solved the «more than 4Gb» issue, why our server will run faster in a 32 bits OS? Notice that the «heavier» program our server will run will be Apache Web server.

As we see in this Phoronix’s benchmark, Apache compiled for 32 bits obtain a slightly better result. Other articles reaffirms this statement.
This performance increase can be noticed in relatively recent CPUs although the difference is smaller.
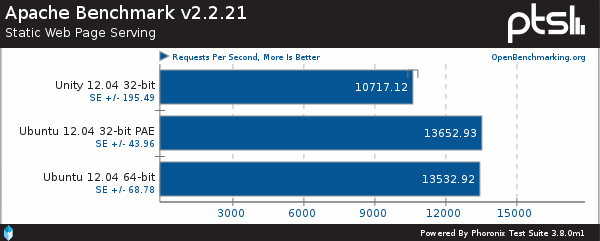
Furthermore, 32 bits gives a higher compatibility with legacy libraries. Finally, we can se that all processes launched by Apache barely reach some tens of megabytes witch is far away from our 4Gb limit.

Obviously if your machine have more than 64 Gb of RAM you have to install a 64 bits OS.
If you are not agreed with this statement, you can leave a message at the end of this page and we will discuss it.
1.2. Debian’s edition
Summary
Install ‘Netinst’ edition.
Explanation
Debian has some editions and we have to choose one of them. In our case we want to get a minimal install, without desktop environment, without unnecessary services, so ‘Netinstl’ edition is the best option. This is a small disk image that have a size of 300Mb.
1.3. Install process
Summary
Follow all install steps. You just have to check just «SSH server» and «Standard system utilities».
Explanation
NOTE: Images in this section are in Spanish. English images coming soon.
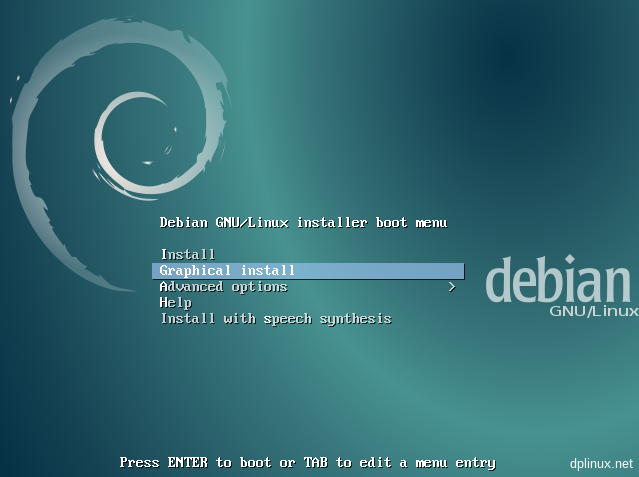
Debian 8 is really easy to install. We want to set up a server so we have to choose some installation options. We will start a graphical install.
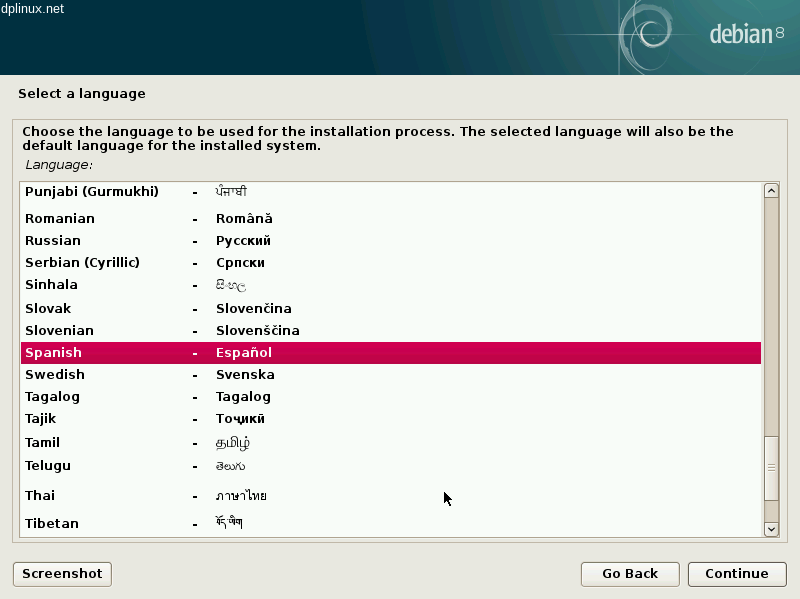
Some seconds later a language screen will be shown. We should choose our preferred language.
Then we have to choose our country. This choice is indepent of the chosen language. This configuration will be used by the system for time zone configuration.

Now we have to put a machine name. You can enter whatever you want.

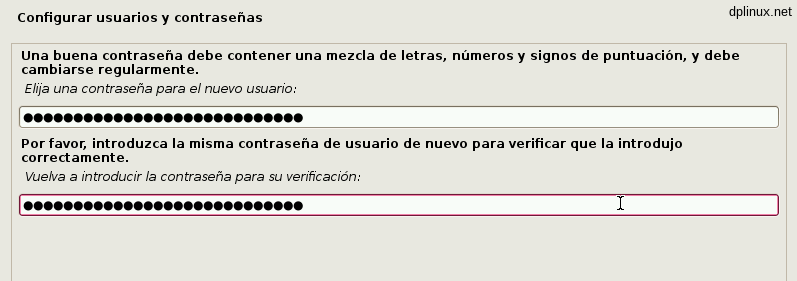
The next step is very important. You have to enter a root password. This password must be decent. Otherwise, our server could be a victim of a brute force attack.

xkdc guys explained what kind of password is the best for our system:

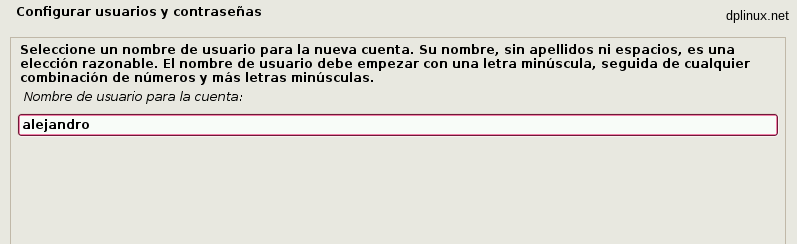
To finish credentials configuration, we have to enter a name and a password for our user. Once again, a good password is very important.

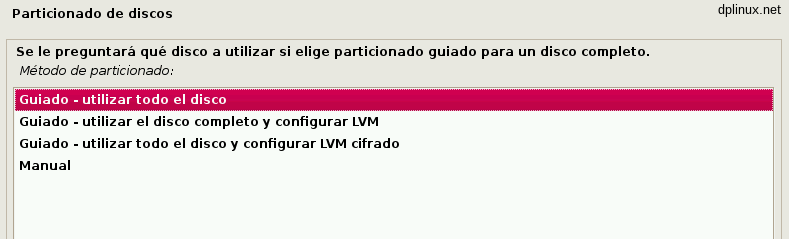
In the next step we have to set up our partitions. If we have not another OS installed in our machine, we can follow the first option: «Guided – use entire disk». For another partition configuration yo have to make a manual set up.
If we have several disk installed in our machine, we have to choose in which drive Debian will be installed.

To finish partitioning, we have to choose our partitions scheme. For us, a good choice is «separate home partition».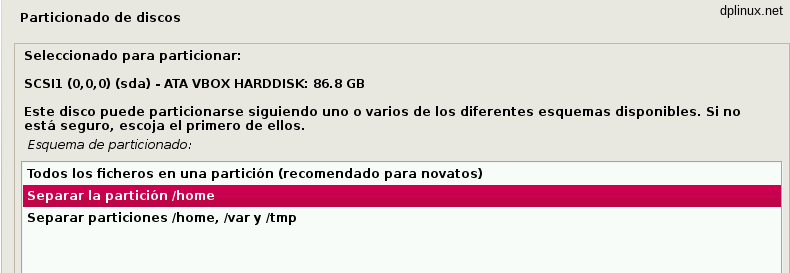
Personal folder stored in a different partition
Once we have entered all installation option, the install wizard will show us a summary. If you had another system or data stored in the target disk, inspect carefully this summary to avoid data loss.
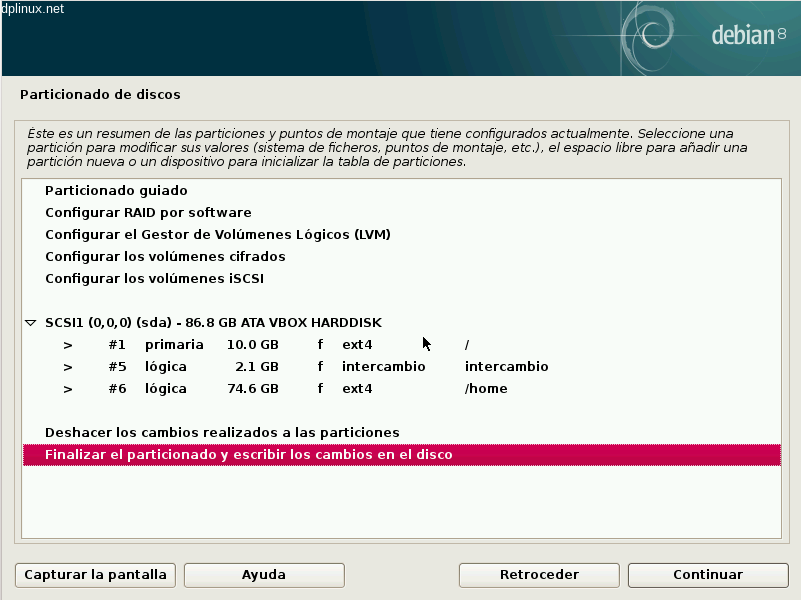
Once confirmed, the base system install will start. Our services will run over this base system.

Some minutes later we have to choose our country again. This time this configuration will be taken to choose the nearest mirror.

Then the wizard will show us a list of preferred mirrors. You can you choose whichever you want.

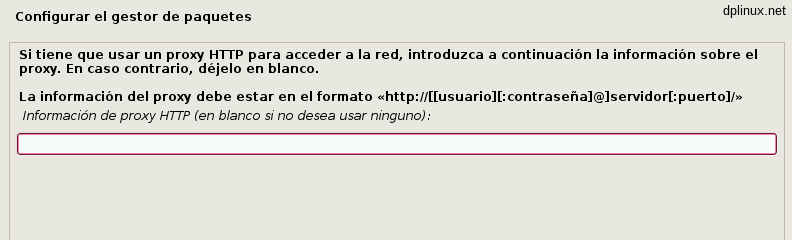
Next screen is useful just for a proxy server. If you are connected directly to Internet through a modem/router, you can leave this in blank.
Now we can participate in the popularity contest, a way to report which packages are installed in your system. If you want to cooperate, you shoud click over ‘yes’.

In the next screen we have to choose which components we want to install. We will check just two of them: SSH server and Standard system utilities.

Now start the last installation process. The speed will depend on our Internet link speed.

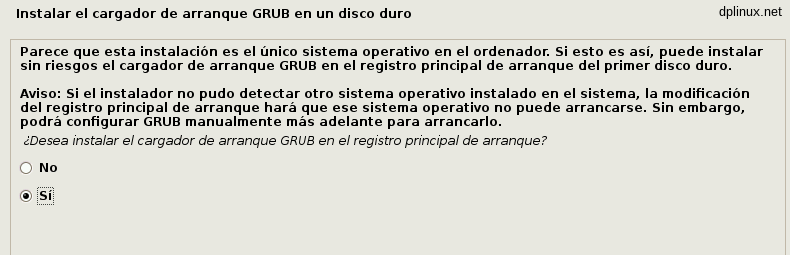
Now the wizard ask us if we want to install a boot loader. We must check ‘yes’.
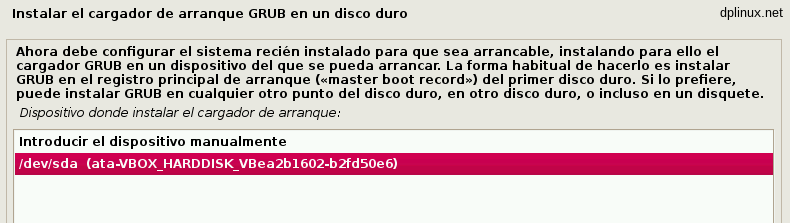
If we have several disks, we must choose the one where boot sector will be pointed to the boot loader.
When the process finish, the OS install has finished.
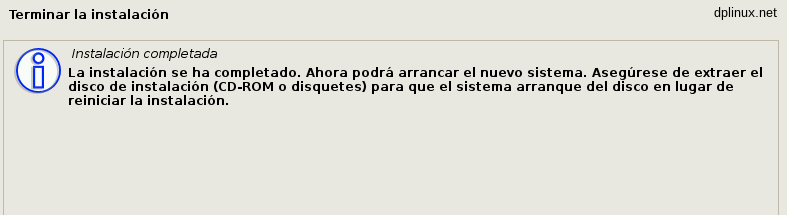
When the system boot for first time, we will watch this screen.

Our system is prepared to run all services we need.
2. Basic concepts
In this section you will fined some basic concepts that you need to follow some steps of this how to. Take a quick look and read it when you need it for some step.
2.1. Copy and paste in a windows concole
For copy text form a window terminal you have to push ctrl+shift+c.
For paste text to a window terminal yo have to push ctrl+shift+v.
Remember that you can move the cursor just though keyboard arrows. You cannot use the mouse for it.
2.2. Nano text editor operations
To explore the document you have to use the keyboard arrows. You can select text with the mouse but you cannot change curse position with it.
To save changes: ctrl+o, enter.
To exit: ctrl+x. If you did changes in the files and you don’t want to save the changes, push ‘n’.

Searh text string: ctrl+w. You can write or paste (2.1. Copy and paste in a window console) the text.
2.3. Log in and log out as root
Root user is the most privileged user in whole system and it is capable of make any operation. In many steps, you’ll need be logged in as root, so in a console windows you must to type this:
su
Next you have to enter root password. As you can see, the user has changed from ‘alejandro’ to ‘root (first text string in the prompt):

To log out as root, type this:
exit

Sometimes you will need to type exit twice. To assure you have log out, check the current user in the last prompt line.
2.4. Config files and sections
Most applications store their configurations in text files that contains parameters beside a value.
Some config files are organized into sections. A section begin with <Section name (values)> and ends with </Section name>. A couple of examples are ‘VirtualHost’ and ‘Directory’ sections for Apache Web Server.
<VirtualHost *:80>
   VirtualHost section paremeters
      <Directory /path>
         Directory section parameters
      </Directory>
</VirtualHost>
‘Directory’ section is in turn within ‘VirtualHost’ section.
All parameters in each sections just run in it. Thus you can create several sections with different properties isolated each.
2.5. Router port redirection
If you want to have access to your services from the Internet, you have to redirect some ports in your router to your server. You just need to know your server’s local IP address and the ports numbers. You can find several guides in Internet for virtually all routers brands. The most important ports are:
· FTP: 21
· SSH: 22
· Web: 80
· Secure Web (HTTPS): 443
· Remote aMule (aMuleGUI): 4712
· Remote Transmission and web managing: 9091
2.6. Owners and permissions for files and folders
In Linux, all files and folders have an owner. A owner is who decide about who can or cannot modify, read and/or execute a file. Those are permissions.
‘Root’ user is able to read and modify whatever it wants independently what permissions has the file or folder.
To modify a file or folder owner you have to use ‘chown’ command:
chown user_name:group /path/file
In Linux, all files and folders have their own permissions and owner. On the other hand there are user groups. It is possible to give permissions to all users of a group.
So there are three categories to give permissions: file o folder owner, all users of a group and the rest o users. To check files and folders permissions, you can type this in a console window:
ls -l

Permission are represented in the left column (ex. -rw-r–r–). Two columns right we can check the owner and the group (usually are the same like root root).
Focus on the first column. We can see some characters and dashes in a particular position. The characters means this:
· d: directory/folder
· r: read permission
· w: write permission
· x: execution permission
That information is separated in four columns. From left to right, the first one say us if the item is a file or a folder and it is made up by one character. If it is a ‘d’, the item is a directory. If it is a dash, the item is a file.
The second column has three characters and those are the permissions for each category. The first character say us if the file or folder has read permission, the second tell write permission and the third one is for execution permision. If there is a character (ex. ‘r’), that means that reading is allowed. If there is a dash, read is not allowed.
The second column tell us group’s permissions. And the third one are the permissions for the rest of users.
If we check out ‘moodle-2.9.tgz’ file, we can it has these characters (from left to right):
–: It is a file (not a directory)
r: The owner can read it
w: The owner can modify it
–: The owner cannot execute it
r: Group’s users can read it
–: Group’s users cannot write in it
–: Group’s users cannot execute it
r: Other users can read it
–: Other users cannot write in it
–: Other users cannot execute it
The simplest way to represent those vales is in binary: a zero means there is no permission and a one means there is permission. Each field has 3 bits (read, write and execution) so octal system is used. It goes from 0 (000) to 7 (111). For example 5 (101) means that it is allowed to read and execute it but not to write in it.
So ‘chmod’ uses this syntax to modify files and folders permissions. In our example, ‘moodle-2.9.tgz’ file had these attributes: 644 (110-100-100). If we want group’s users can write in it, we have to modify the second column from 4 to 6. So the result is 664 (110-110-100). By using ‘chmod’:
chmod 664 moodle-2.9.tgz
Obviously to perform this operation, we have to have to have the appropriate permission.
If you know nothing about binary and octal systems, the equivalence is this: 000=0, 001=1, 010=2, 011=3, 100=4, 101=5, 110=6, 111=7.
3. Post-install configurations
Summary
If you will manage your server through SSH, you have to figure out your local IP address. Your router DHCP table can give you some clue. If you are not able to obtain you address, log in locally.
Explanation
Once Debian 8 is installed in our system, we have to perform some operations before we can install all services.
We can manage our server locally or remotely. If we want a local management, we just have to log in. If we want to manage the server remotely though SSH, we can unplug all peripherals.
First of all we need get our server local IP address for which you can see you router’s DHCP table. If you do not get a clue, you’ll have to log in locally.

3.1. Network set up
Procedure
As root:
nano /etc/network/interfaces
Replace the last line by:
auto eth0
 iface eth0 inet static
 address out_local_ip
 netmask subnet_mask
 gateway gateway
reboot
Explanation
Due to the nature of our system (a server), it is very important to have a fixed IP local address because our router will redirect the desired ports to that IP. If it changes, our server would remain offline from the Internet.
To configure a static IP address we will edit a file called ‘interfaces’. For that, as root (2.3. Log in and log out as root), we type this:
nano /etc/network/interfaces
We’ll see this:
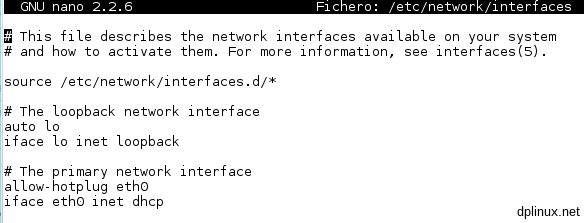
We must to replace the last line by:
auto eth0
 iface eth0 inet static
 address local_ip_address
 netmask subnet_mask
 gateway gateway_to_router
· address is our local IP address. We can choose a cass A address (10.0.0.0 to 10.255.255.255) a class B (172.16.0.0 to 172.31.255.255) or a class C (192.168.0.0 to 192.168.255.255). The most extended for home use is class C.
· netmask normally is 255.255.255.0.
· gateway is our router local IP address. By default the most of routers use 192.168.1.1.
In my case, the config file remain like this:

Once we have save the changes, we have to exit from Nano (2.2. Operations with Nano text editor). To apply the changes, we have to restart the computer, so as root:
reboot
When it is restarted, we can check our new local IP address. If we log in through SSH, this change must be taken in consideration:
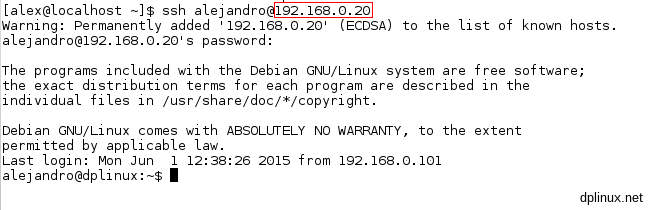
3.1. System update
Procedure
As root:
apt-get update
apt-get upgrade
Explanation
We did a net install so our system should be updated but we will perform an update to ensure that.
First of all, as root (2.3. Log in and log out as root) we type this:
apt-get update
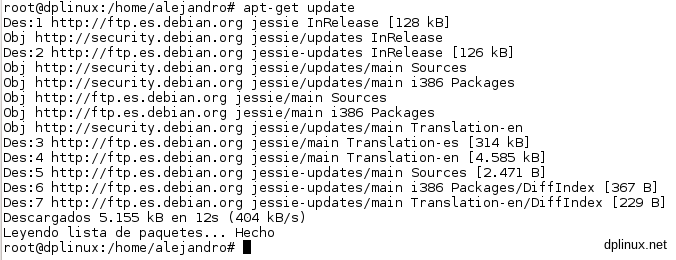
With this operation, the package database is updated so now the system knows which packages are available both to update and to install. Every time we want to install a package or update the system, we must to run this command.
Now we type this:
apt-get upgrade

There is nothing to update as expected.
You must perform this operation periodically because from time to time, the security team publish security patched witch are very important when you are directly connected to the Internet. Some times the updates bring new features and performance improvements.
3.2. Essential tools install
To be able to edit config text files, we’ll need a text editor. You can install whatever you want but ‘nano’ is one of the lightest and easier to use. To install Nano we just need to type this as root (2.3. Log in and log out as root):
apt-get update
apt-get install nano
4. Web services
Now our Debian 8 installation is ready to start to install all services we need.
4.1. Apache web server
Procedure
As root:
apt-get update
apt-get install apache2 apache2-doc apache2-utils
Explanation
Apache is one of the most used web servers and we will use it. Debian 8 comes with Apache 2.4, the latest stable version.
To install Apache 2 we have to type this as root (2.3. Log in and log out as root):
apt-get update
apt-get install apache2 apache2-doc apache2-utils
We’ll see this information:
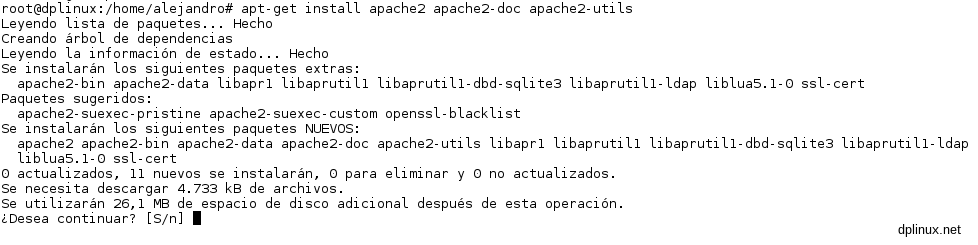
Now you have to confirm the dependencies and wait some minutes. Once the installation has finished, the service is started and it will be started in every system boot. To check if it is running, you can put your local IP in a web browser on a computer connected to the local area net:

By default, all web server files are stored in /var/www/html where you can find the ‘index.html’ file that is shown by default (the web page shown above). This file must be replaced by your ‘index.html’.
This path can be changed (4.1.2. Virtual hosts). In any case, you can begin to upload your content to that folder and it will be accessible since now.
4.1.1. Limit amount of Apaches threads
Procedure
As root:
apt-get update
apt-get install apache2-mpm-prefork
nano /etc/apache2/apache2.conf
Add this to the end of apache2.conf file:
<IfModule mpm_prefork_module>
   StartServers 5
   MinSpareServers 5
   MaxSpareServers 10
   MaxClients 150
   MaxRequestsPerChild 0
</IfModule>
/etc/init.d/apache2 restart
Explanation
Sometime our server could receive a huge amount of web requests. If that happens, Apache will launch a lot of Apache threads which can end up filling all RAM memory. Then, the system will use the SWAP partition so our server will work extremely slow. If the maximum number of threads are limited, we can avoid this situation.
For that you have to install an Apache module called MPM Prefolk. As root (2.3. Log in and log out as root):
apt-get update
apt-get install apache2-mpm-prefork
Once the installation has finished, you have to edit Apache’s config file. This file is stored in /etc/apache2/apache2.conf so you have to type this to edit it witch Nano (2.2. Operations with Nano text editor) as root:
nano /etc/apache2/apache2.conf
When the file is opened, you have to add this text:
<IfModule mpm_prefork_module>
   StartServers 5
   MinSpareServers 5
   MaxSpareServers 10
   MaxClients 150
   MaxRequestsPerChild 0
</IfModule>
The meaning of each line is this:
· StartServers: amount of threads running when Apache starts.
· MinSpareServers: minimum amount of Apache threads waiting for a request. This ‘idle’ threads will increase the speed of all requests delivery.
· MaxSpareServers: max amount of idle threads.
· MaxClients: max amount of threads that can be run. This is the most important value to control the RAM consume. To figure out how many threads can be run, you must know how much consumes everyone. To check it you can run a system monitor like Top.
· MaxRequestsPerChild: this is the limit of requests per thread. If this value is too high, malfunctions could happen. If the number is too low, the performance will decrease.
Finally you must restart Apache typing this as root:
/etc/init.d/apache2 restart
4.1.2. Virtual hosts
Procedure
As root:
nano /etc/apache2/sites-available/000-default.conf
Use this as template:
<VirtualHost *:80>
   DocumentRoot "/home/Server/dplinux.net/"
   ServerName dplinux.net
   ServerAlias dplinux.net
   CustomLog ${APACHE_LOG_DIR}/access_dplinux.log combined
</VirtualHost>
nano /etc/apache2/apache2.conf
Remove all ‘Diretory’ sections in this file (2.4. Config files and sections).
/etc/init.d/apache2 restart
Explanation
Of we want to access to different web pages from different domain names using a single server, you must use Virtual Hosts. This allows you to choose which web page is delivered from a particular domain name and it allows you to choose the path where the web page is stored.
Virtual hosts configuration is stored in the file ‘000-default.conf’, so as root (2.3. Log in and log out as root) type this:
nano /etc/apache2/sites-available/000-default.conf
Now you can edit the file with Nano (2.2. Operations with Nano text editor):
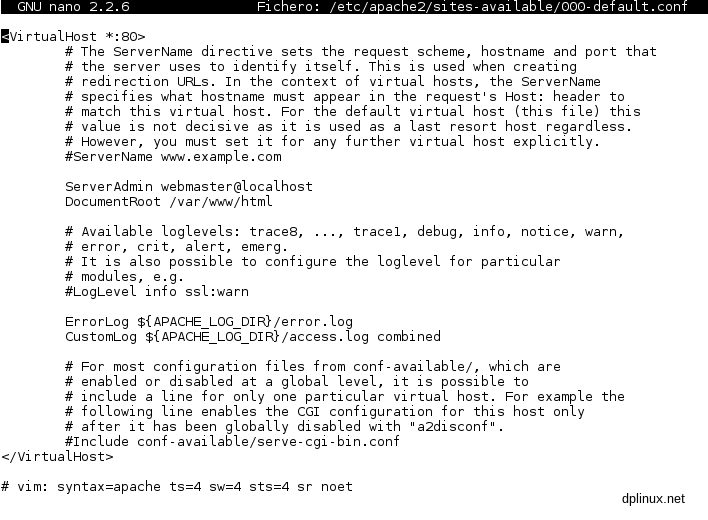
The important lines are:
· ServerAdmin: administrator email address
· DocumentRoot: folder where the web page is stored.
· ErrorLog: patch where all error will be logged.
This is a good template with two Virtual Hosts:
<VirtualHost *:80>
   DocumentRoot "/home/Servidor/dplinux.net/"
   ServerName dplinux.net
   ServerAlias dplinux.net
   CustomLog ${APACHE_LOG_DIR}/access_dplinux.log combined
</VirtualHost>
<VirtualHost *:80>
   DocumentRoot "/home/Server/alexcobo.net/"
   ServerName alexcobo.net
   ServerAlias alexcobo.net
   CustomLog ${APACHE_LOG_DIR}/access_alexcobo.log combined
</VirtualHost>
You just have to enter the domain name in ‘ServerName’ and ‘ServerAlias’ so when there is a request from that domain name, the server will deliver the content stored in ‘DocumentRoot’.
To avoid conflicts with the default configuration, you have to edit apache2.conf file:
nano /etc/apache2/apache2.conf
Now you have to delete all ‘Directory’ sections (2.4. Config files and sections).
To complete the configurarion, you must restart the server:
/etc/init.d/apache2 restart
But, how does it works? When you request a web page from your server:
· You type https://dplinux.net in your web browser.
· Your computer ask to DNS server the IP related to that domain name.
· Your computer connects to that IP address and tell to the server that is requesting a web page from that domain.
· Our web server check the configuration file to figure out which content to deliver.
4.1.3. Enable .htaccess file
Procedure
As root:
a2enmod rewrite
nano /etc/apache2/sites-available/000-default.conf
You have to add a Directory section within ths VirtualHost section like this:
<Directory "/var/www/html">
   Options Indexes FollowSymLinks MultiViews
   AllowOverride All
</Directory>
Explanation
.htaccess file is a very important config file. This file is available in each subfolder of our server. This file is able to block certain pages, to limit our images sharing/linking and much more.
To enable it you have to enable a module called «rewrite», so as root(2.3. Log in and log out as root) you must type:
a2enmod rewrite
Now you have to edit (2.2. Operations with Nano text editor) the file 000-default.conf as root:
nano /etc/apache2/sites-available/000-default.conf
There you have to create a Directory section within the desired VirtualHost section (2.4. Config files and sections). For that, you just have to copy the next text in the chosen VirtualHost section:
<Directory "/var/www/html">
   Options Indexes FollowSymLinks MultiViews
   AllowOverride All
</Directory>
In the Directory field you have to type the path to your local web page folder which you want the file .htaccess is enabled. If you want to enable .htaccess files in some folder and disable it in others, you can use a template like this:
<Directory "/var/www/html">
   AllowOverride None
</Directory>

<Directory "/var/www/html/wordpress">
   Options Indexes FollowSymLinks MultiViews
   AllowOverride All
</Directory>

Thus, -htaccess will works in ‘/var/www/html/wordpress’ but not in ‘/var/www/html’. Each Directory section is independent of each other section.
To finish, you have to restart Apache web server as root:
/etc/init.d/apache2 restart
4.1.3.1. Block web page access
One possibility of .htaccess file is to block the access to a web page stored in a subforder or file.
If you don’t have a .htaccess file yet, you can create one by doing this:
touch /var/www/html/subcarpeta/.htaccess
nano /var/www/html/subcarpeta/.htaccess
To block a file access, you have to paste this text in at the end of the .htaccess file:
<Files file.html>
   order deny,allow
   deny from all
</Files>
To prohibit the access to a folder, you can paste this:
<Directory /var/www/html/subfolder/blocked>
   order deny,allow
   deny from all
</Directory>
4.1.3.2. Mover web page address
Some times maybe you could want to move our web page to another address, for example if you want to change your domain name.
If you want search bots and users can access to your new address without knowing the new address, you can redirect all your content to the new domain. Thus, web browsers and bots will receive a state code called «301 moved permanently».
You just have to create a .htaccess file in the desired subfolder where the web page was stored:
touch /var/www/html/subcarpeta/.htaccess
nano /var/www/html/subcarpeta/.htaccess
Finally you have to paste this text:
Options +FollowSymLinks
RewriteEngine on
RewriteRule (.*) http://new_domain.com/$1 [R=301,L]
4.1.3.3. Enable web browser cache
If web browser cache is enabled, we will spare some bandwidth when our server delivers some content like images. Furthermore the client will load the page faster.
First of all you have to enable a module called ‘Expires’ and then you must restart Apache as root:
a2enmod expires
/etc/init.d/apache2 restart
If you don’t have a .htaccess, you must create one:
touch /var/www/html/subcarpeta/.htaccess
nano /var/www/html/subcarpeta/.htaccess
Finally you have to add this text to the .htaccess file:
<IfModule mod_expires.c>
   <filesmatch "\.(jpg|JPG|jpeg|JPEG|gif|GIF|png|PNG|css|ico)$">
      ExpiresActive on
      ExpiresDefault "access plus 30 day"
   </filesmatch>
</IfModule>
The most important parameters are:
· filesmatch: there you have to type all file extensions that will be stored in the client browser cache. You should choose just the bigger files and not to include html or php extensions because any change in this files will not be delivered to previous web site viewers.
· ExpiresDefault «access plus xx day»: this parameter designates cache expiration. If the number of days is bigger, the recurrent clients will consume less bandwidth but any change in any cached file will not be perceived by the client.
4.1.4. DoS protection
Procedure
As root :
apt-get update
apt-get install libapache2-mod-evasive
mkdir -p /var/log/apache2/evasive
chown -R www-data:root /var/log/apache2/evasive
nano /etc/apache2/mods-available/mod-evasive.load
Paste this template:
LoadModule evasive20_module /usr/lib/apache2/modules/mod_evasive20.so
 DOSHashTableSize 2048
 DOSPageCount 20
 DOSSiteCount 30
 DOSPageInterval 1.0
 DOSSiteInterval 1.0
 DOSBlockingPeriod 10.0
 DOSLogDir "/var/log/apache2/evasive"
 DOSEmailNotify email@server
/etc/init.d/apache2 restart
Explanation
Internet is a wild and anarchic habitat where there are no rules or laws regarding how to access services. It is common for search robots to perform an excessive exploration of your site and, if you have many published web pages, these robots can crash the server.
There are several ways to minimize damage. One already mentioned in section 4.1.1. Apache threads limit. But there are modules that ban automatically non-civic users.
We will use a module called ‘Evasive’ and it will avoid big damages. To install it you have to type this as root (2.3. Log in and log out as root):
apt-get update
apt-get install libapache2-mod-evasive
mkdir -p /var/log/apache2/evasive
chown -R www-data:root /var/log/apache2/evasive
![[instalacion evasive]](https://dplinux.net/wp-content/uploads/2015/06/instalacion-evasive.png)
Every time someone attacks our server, a log file will be created in the folder var/log/apache2/evasive‘ called attacker’s IP. Inside this file you’ll see a number showing the PID of the Apache process that was killed to neutralize the attack.
Once the module is installed, it must be configured so you have to edit the text file (2.2. Operations with Nano text editor) stored in ‘/etc/apache2/mods-available/mod-evasive.load’ as root:
nano /etc/apache2/mods-available/mod-evasive.load
Then you will find an empty file that you have to fill like this:

Here you have a good template which you can copy and paste to your configuration file:
LoadModule evasive20_module /usr/lib/apache2/modules/mod_evasive20.so
 DOSHashTableSize 2048
 DOSPageCount 20
 DOSSiteCount 30
 DOSPageInterval 1.0
 DOSSiteInterval 1.0
 DOSBlockingPeriod 10.0
 DOSLogDir "/var/log/apache2/evasive"
 DOSEmailNotify email@server
The meaning of these parameters are:
· DOSHashTableSize: size of the checked IP list.
· DOSPageCount: requests limit for a particular web page.
· DOSSiteCount: requests limit for a particular web page from a particular IP address.
· DOSPageInterval: this is the time interval in seconds which is used to count the amount of access tries to a particular web page by one particular client.
· DOSSiteInterval: this is the time interval in seconds which is used to count the amount of access tries to any page by one particular client.
· DOSBlockingPeriod: ban time in seconds.
Once all is ready, you have to restart Apache web server as root:
/etc/init.d/apache2 restart
4.1.5. HTTPS secure web thought SSL-RSA
Procedure
As root:
a2enmod ssl
a2ensite default-ssl
/etc/init.d/apache2 restart
openssl genrsa -des3 -out server.key 2048
openssl req -new -key server.key -out server.csr
openssl x509 -req -days 365 -in server.csr -signkey server.key -out server.crt
cp server.crt /etc/ssl/certs/
cp server.key /etc/ssl/private/
nano /etc/apache2/sites-available/default-ssl.conf
Paste this template:
<IfModule mod_ssl.c>
   <VirtualHost _default_:443>
      ServerAdmin email@server.com
      DocumentRoot /var/www/html
      ErrorLog ${APACHE_LOG_DIR}/error.log
      CustomLog ${APACHE_LOG_DIR}/access.log combined
      SSLEngine on
      SSLCertificateFile /etc/ssl/certs/server.crt
      SSLCertificateKeyFile /etc/ssl/private/server.key
         <FilesMatch "\.(cgi|shtml|phtml|php)$">
            SSLOptions +StdEnvVars
         </FilesMatch>
         <Directory /usr/lib/cgi-bin>
            SSLOptions +StdEnvVars
         </Directory>
      BrowserMatch "MSIE [2-6]" \
      nokeepalive ssl-unclean-shutdown \
      downgrade-1.0 force-response-1.0
      BrowserMatch "MSIE [17-9]" ssl-unclean-shutdown
   </VirtualHost>
</IfModule>
cd /etc/ssl/private/
cp server.key server.key.otr
openssl rsa -in server.key.otr -out server.key
/etc/init.d/apache2 restart
Explanation
If you want a secure link to your website through HTTPS you have to have a SSL certificate. SSL (Secure Sockets Layer) is the most used encryption protocol for the web and RSA (Rivest, Shamir, Adleman) is the algorithm which will encrypt the data that will be sent trough SSL.
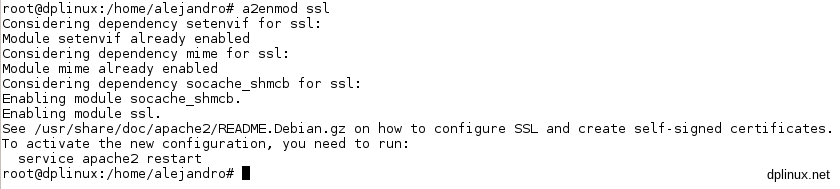
First of all we have to enable Apache’s SSL module. This module is installed by default so we just must to type this as root (2.3. Log in and log out as root):
a2enmod ssl
Before we have to create a configuration file for secure sites by executing this line:
a2ensite default-ssl
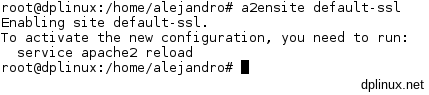
This operation will enable the config file for secure SSL connections. This file is stored in /etc/apache2/sites-available/. Once this two operations are performed, we must restart Apache, so as root:
/etc/init.d/apache2 restart
Now we must create a RSA key pair. This algorithm will create a public and a private key (a key pair) which will be possible to establish a secure link between the server and a client.
RSA works with two keys: a public key and a private key. The private one remains stored in the server and it is secret. The public one es know by the client (web browser). Anything encrypted by the public key through RSA can be decrypted just by the public key (but not with the private one). And anything encrypted by the public key can be decrypted just by the private key (but not by the public one). This method allows to establish a secure link like this:
· The client send its public key to the server and the server sends its public key (not the same client key) to the client.
· At this moment, the client encrypt all data by the public key sent by the server, so the encypted data can be decrypted just by the private (secret) key of the server. For the other way communication the process is the same.
So a public key is tied to a private key and vice versa and it is very difficult (almost impossible with current technology) to get a private key from a public key.
To create a key pair tied with each other we will use a tool called OpenSSL that is installed by default in Debian 8. First of all we will create a key pair with a length of 2048 bits (the minimum recommended nowadays):
openssl genrsa -des3 -out server.key 2048
Now we must type a password. This password will determine the key pair created and will add randomness to the pair creation. This password must be reminded.

Now we must to create a certificate based in the generated key. A certificates is a file which accredit to the web browser that the connection is provided by the expected server and there is no identity theft. Through a certificate, the server will provide the information required to establish a secure link. As root type this:
openssl req -new -key server.key -out server.csr
![[certificado ssl]](https://dplinux.net/wp-content/uploads/2015/06/certificado-ssl.png)
Finally we have to sign the certificate to ensure the client all data is being provided by the expected server (encrypted by our private key). To do that, as root:
openssl x509 -req -days 365 -in server.csr -signkey server.key -out server.crt
The parameter ‘365’ says that the certificate will be valid during a year but this expiration will not prevent secure links beyond that date. When we execute that line, this tool will ask us for the password we used to generate the key pairs:

Now we have two important files: server.key (our key pair) and server.crt (our signed certificate). We must to copy those files to /etc/ssl/ to be recognized by Apache. To do that, as root:
cp server.crt /etc/ssl/certs/
cp server.key /etc/ssl/private/
Now we edit the configuration file for secure sites (2.2. Operations with Nano text editor) that is stored in /etc/apache2/sites-available. As root:
nano /etc/apache2/sites-available/default-ssl.conf
Here we can see a lot of text which reminds us the structure of the non-secure sites configuration file (4.1.2. Virtual hosts), so the configuration is very similar but this time we will use the port 443 reserved for HTTPS connections instead of port 80 reserved for HTTP.
A good template could be this one:
<IfModule mod_ssl.c>
   <VirtualHost _default_:443>
      ServerAdmin email@server.com
      DocumentRoot /var/www/html
      ErrorLog ${APACHE_LOG_DIR}/error.log
      CustomLog ${APACHE_LOG_DIR}/access.log combined
      SSLEngine on
      SSLCertificateFile /etc/ssl/certs/server.crt
      SSLCertificateKeyFile /etc/ssl/private/server.key
         <FilesMatch "\.(cgi|shtml|phtml|php)$">
            SSLOptions +StdEnvVars
         </FilesMatch>
         <Directory /usr/lib/cgi-bin>
            SSLOptions +StdEnvVars
         </Directory>
      BrowserMatch "MSIE [2-6]" \
      nokeepalive ssl-unclean-shutdown \
      downgrade-1.0 force-response-1.0
      BrowserMatch "MSIE [17-9]" ssl-unclean-shutdown
   </VirtualHost>
</IfModule>
The most important parameters are:
· SSLCertificateFile where we have to type the certificate path.
· In SSLCertificateKeyFile goes the key pair file path.
Within VirtualHost section we can type the same configuration than the config file for non-secure sites.
Once the configuration is stored, Apache must be restarted:
/etc/init.d/apache2 restart
Then we must to type the password we used to generate the RSA keys:

This password request will happens every time we start Apache service which include the system boot up. This is a mess because the start automatization of all services in the boot process is very important in any server. To avoid the password request, type this:
cd /etc/ssl/private/
cp server.key server.key.otr
openssl rsa -in server.key.otr -out server.key

With this operation, we will regenerate the key pair without a password maintaining the same keys. Remember that the password helped to add randomness to the key pair generation. Now we hay a key pair generated with a good randomness without a password.
When you restart Apache, you can see that the password is not required anymore.
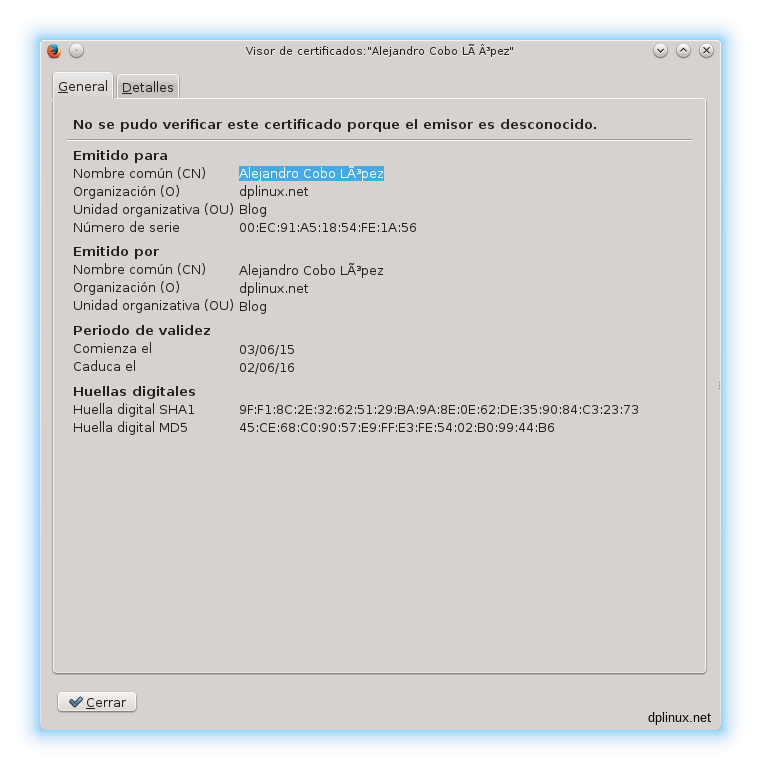
Once all is ready, we van check our secure site using an address like https://your_ip. The first time we will see the typical message:
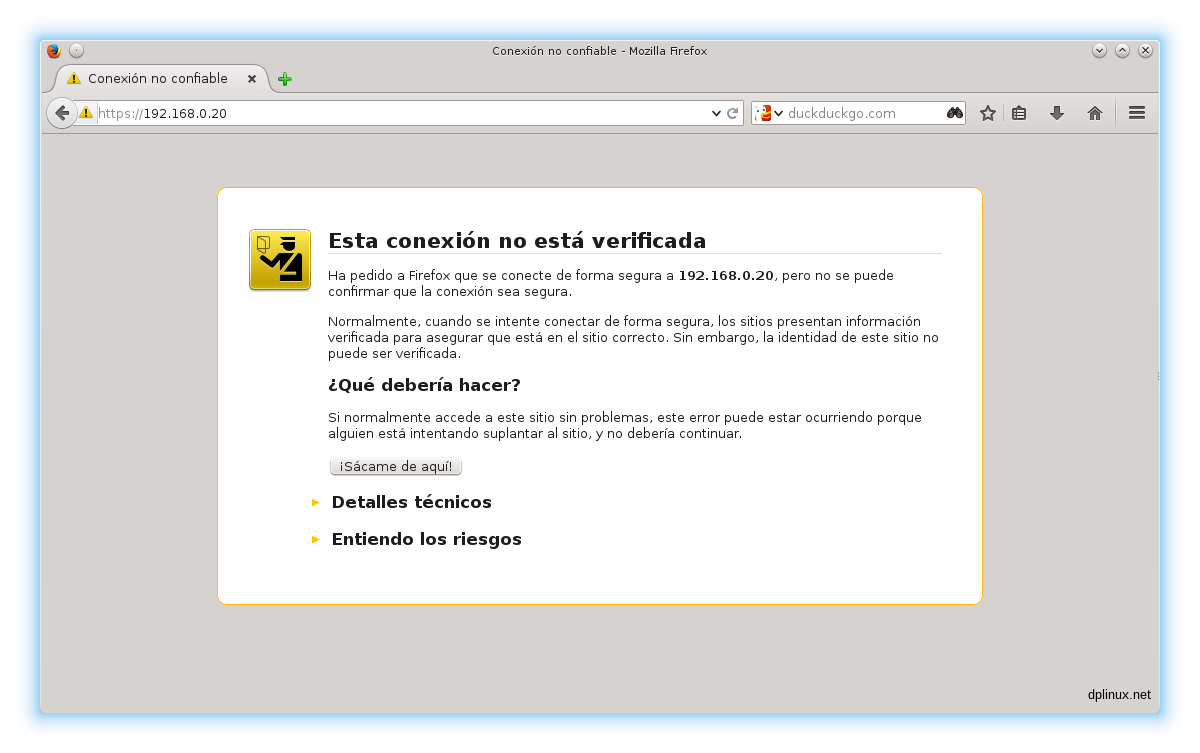
This happens because our certificate is not in any root certificate stored in our web browser because our certificate does not comes from a certification authority (CA). This does not compromises the security. If we see the information of the certificate obtained by the browser we can check all data entered previously:
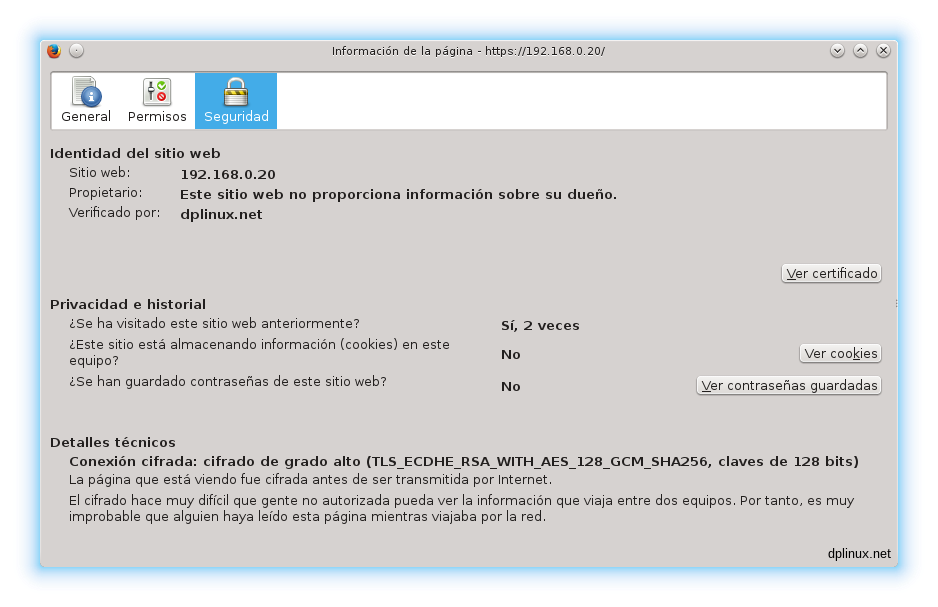
We add an exception and we obtain our secure web page:

If we get the link details, we can check out that Firefox judge this link as a high security connection.
4.1.6. Password protected web
Procedure
As root:
htpasswd -c /var/www/html/subfolder/.htpasswd username
nano /etc/apache2/sites-available/000-default.conf
Paste this within desired VirtualHost section:
<Directory "/var/www/html/subfolder/">
   AllowOverride All
   Order allow,deny
   Allow from all
   Options +ExecCGI -MultiViews +SymLinksIfOwnerMatch
</Directory>
touch /var/www/html/subfolder/.htaccess
nano /var/www/html/subfolder/.htaccess
Paste this:
AuthName "Introduce credenciales"
AuthType Basic
AuthUserFile /var/www/html/subcarpeta/.htpasswd
require valid-user
/etc/init.d/apache2 restart
Explanation
If you want to protect a subfolder from prying eyes, you just have to put a password.
First of all we must to generate a new user with a password for Apache. As root (2.3. Log in and log out as root):
htpasswd -c /var/www/html/subfolder/.htpasswd username
The path must be out protected subfolder.
Now we enter the password. Then we have to edit the websites configuration file (2.2. Operations with nano text editor):
nano /etc/apache2/sites-available/000-default.conf
Within VirtualHost section (2.4. Config files and sections), paste this modifying the path in ‘Directory’ where is stored the desired subfolder:
<Directory "/var/www/html/subfolder/">
   AllowOverride All
   Order allow,deny
   Allow from all
   Options +ExecCGI -MultiViews +SymLinksIfOwnerMatch
</Directory>
Finally we have to create a .htaccess file:
touch /var/www/html/subcarpeta/.htaccess
nano /var/www/html/subcarpeta/.htaccess
Pasting this:
AuthName "Introduce credenciales"
AuthType Basic
AuthUserFile /var/www/html/subcarpeta/.htpasswd
require valid-user
AuthUserFile paremeter must be set with the path where the password file which we created previously has been stored. The rest of parameters remains unaltered.
When we restart Apache, the web browser will ask us for a password to watch the content stored in that folder:
/etc/init.d/apache2 restart
4.1.7. AWStats web statistics
Procedure
As root :
apt-get update
apt-get install awstats libnet-ip-perl libgeo-ipfree-perl
nano /usr/share/doc/awstats/examples/awstats_configure.pl
Replace these lines:
$AWSTATS_PATH='/usr/share/awstats';
$AWSTATS_ICON_PATH='/usr/share/awstats/icon';
$AWSTATS_CSS_PATH='/usr/share/awstats/css';
$AWSTATS_CLASSES_PATH='/usr/share/awstats/lib';
$AWSTATS_CGI_PATH='/usr/lib/cgi-bin';
$AWSTATS_MODEL_CONFIG='/usr/share/doc/awstats/examples/awstats.model.conf';
$AWSTATS_DIRDATA_PATH='/var/lib/awstats';
chown www-data /usr/lib/cgi-bin/awstats.pl
nano /etc/awstats/awstats.dplinux.net.conf
Paste this:
LogFile="/var/log/apache2/access_dplinux.log"
LogFormat=1
SiteDomain="dplinux.net"
DNSLookup=0
LoadPlugin="tooltips"
LoadPlugin="geoipfree"
chmod 755 /var/log/apache2
nano /etc/crontab
Paste this before the last line:
*/10 * * * * root /usr/lib/cgi-bin/awstats.pl -config=dplinux.net -update > /dev/null
cd /usr/lib/cgi-bin/
touch .htaccess
nano .htaccess
Paste this:
<Files "awstats.pl">
AuthName "Enter credentials"
AuthType Basic
AuthUserFile /var/www/html/awstats/.htpasswd
require valid-user
</Files>
htpasswd -c /var/www/html/awstats/.htpasswd username_to_see_statistics
nano /etc/apache2/sites-available/000-default.conf
Within VirtualHost section where you want get statistics, paste this:
Alias /icon/ /usr/share/awstats/icon/
   <Directory /usr/share/awstats/icon>
      Options None
      AllowOverride None
      Order allow,deny
      Allow from all
   </Directory>
ScriptAlias /cgi-bin/ /usr/lib/cgi-bin/
   <Directory "/usr/lib/cgi-bin">
      AllowOverride All
      Options +ExecCGI -MultiViews +SymLinksIfOwnerMatch
      Order allow,deny
      Allow from all
   </Directory>

Alias /awstatsclasses "/usr/share/awstats/lib/"
Alias /awstats-icon/ "/usr/share/awstats/icon/"
Alias /awstatscss "/usr/share/doc/awstats/examples/css"
ScriptAlias /estadisticas/ /usr/lib/cgi-bin/
/usr/lib/cgi-bin/awstats.pl -config=dplinux.net -update
a2enmod cgi
/etc/init.d/apache2 restart
Explanation
AWStats is a tool which log all activity related with Apache web server. Basically it generates number of visitors, graphics and so on statistics ordered by time: days, weeks, months.
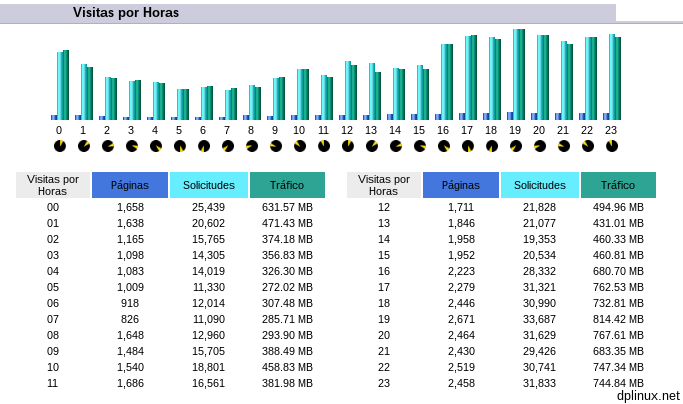
AWStats data source is the log file of Apache so this is the most accurate system to know the actual number of visits to our website.

To run statistics with ASWStats, we have to install some packages as root (2.3. Log in and log out as root):
apt-get update
apt-get install awstats libnet-ip-perl libgeo-ipfree-perl
This packages are tools to identify the geographical location of each IP address. Once installed, we have to edit AWStats’s config file (2.2. Operations with Nano text editor):
nano /usr/share/doc/awstats/examples/awstats_configure.pl
That file contains this:
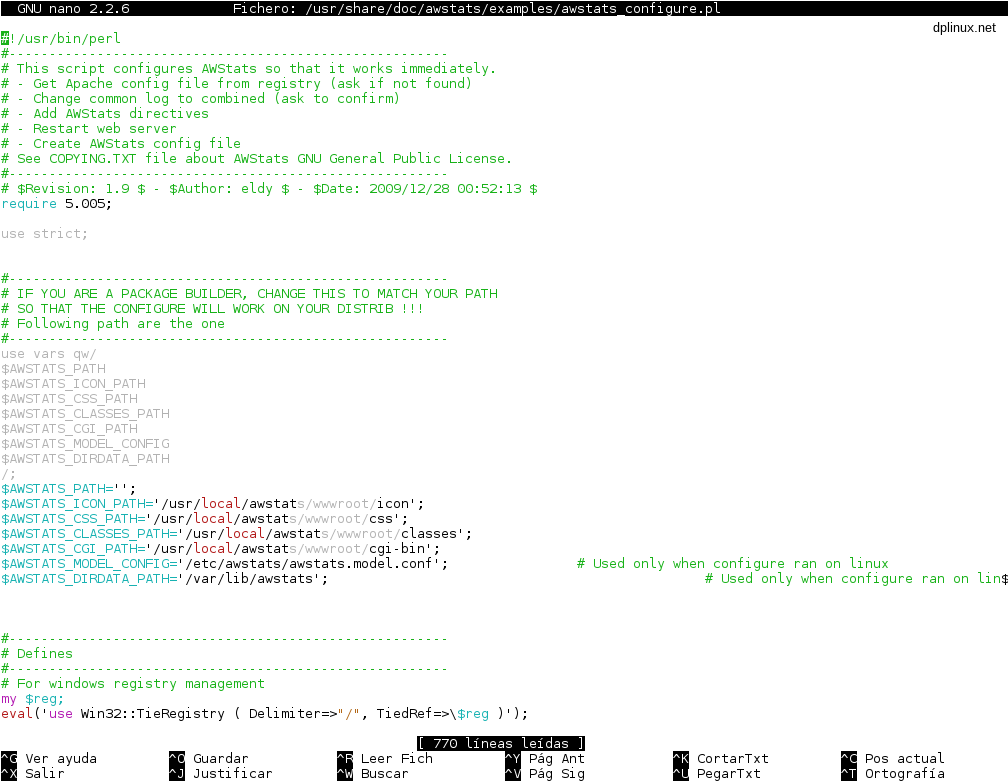
We must modify all lines related with paths (blue colour in above image). All those must be replaced by this:
$AWSTATS_PATH='/usr/share/awstats';
$AWSTATS_ICON_PATH='/usr/share/awstats/icon';
$AWSTATS_CSS_PATH='/usr/share/awstats/css';
$AWSTATS_CLASSES_PATH='/usr/share/awstats/lib';
$AWSTATS_CGI_PATH='/usr/lib/cgi-bin';
$AWSTATS_MODEL_CONFIG='/usr/share/doc/awstats/examples/awstats.model.conf';
$AWSTATS_DIRDATA_PATH='/var/lib/awstats';
To allow Apache to run the program that shows statistics we have to change its permissions:
chown www-data /usr/lib/cgi-bin/awstats.pl
Now we have to set up AWStats for our site. This operation must be performed for each name domain if each one is logged by a different log file as we saw in 4.1.2. Virtual hosts. We have to edit/create a file called awstats.our_domain.conf that must be stored in /etc/awstats/. In my case, the line would be like this:
nano /etc/awstats/awstats.dplinux.net.conf
Within that file we have to copy this:
LogFile="/var/log/apache2/access_dplinux.log"
LogFormat=1
SiteDomain="dplinux.net"
DNSLookup=0
LoadPlugin="tooltips"
LoadPlugin="geoipfree"
Those parameters must be modified depending on ‘000-default’ file we set up previously in 4.1.2. Virtual hosts. Furthermore we have enabled the plugin ‘tooltip’ which shows us a description message of each field when the statistics are showed. Also ‘geoipfree’ has been enabled too. This plugin brings us geographics statistics depending on visitor’s IP address.
In the next step we will modify Apache’s log files permissions to allow AWStats to have access to those:
chmod 755 /var/log/apache2
Now we have to set up ‘con’ service. This service executes programs periodically. It is necessary to run AWStats to make statistics. To do that, as root:
nano /etc/crontab
That file contains this:
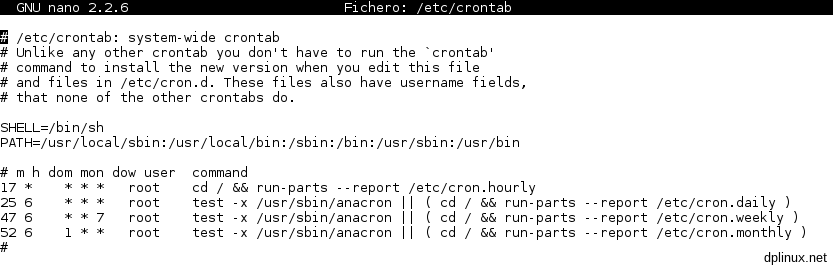
After the last line we paste this:
*/10 * * * * root /usr/lib/cgi-bin/awstats.pl -config=dplinux.net -update > /dev/null
This line means tha every 10 minutes, awstats.pl script will be run as root user for dplinux.net’s configuration. The time can be modified but 10 minutes is a good period. The -config parameter must be configured with our domain.
Normally we will not want that statistics are public so we have to put a password to the page. To do that we go to /usr/lib/cgi-bin/ folder and we create a .htaccess by doing this as root:
cd /usr/lib/cgi-bin/
touch .htaccess
nano .htaccess
We can paste this template:
<Files "awstats.pl">
AuthName "Enter credentials"
AuthType Basic
AuthUserFile /var/www/awstats/.htpasswd
require valid-user
</Files>
With this configuration we are saying that awstats.pl will require a password when it is watched from a web browser. This file generates a view of all statistics in our browser.
Once saved, we exit and we create a new folder in var/www/html/:
cd /var/www/html
mkdir awstats
cd awstats
There we have to run this line as root:
htpasswd -c /var/www/html/awstats/.htpasswd username_to_watch_statistics
Then a password for that user will be requested:

Now we edit the config file of our web sites:
nano /etc/apache2/sites-available/000-default.conf
At the end of the VirtualHost section where we want to get statistics, we paste this:
Alias /icon/ /usr/share/awstats/icon/
   <Directory /usr/share/awstats/icon>
      Options None
      AllowOverride None
      Order allow,deny
      Allow from all
   </Directory>
ScriptAlias /cgi-bin/ /usr/lib/cgi-bin/
   <Directory "/usr/lib/cgi-bin">
      AllowOverride All
      Options +ExecCGI -MultiViews +SymLinksIfOwnerMatch
      Order allow,deny
      Allow from all
   </Directory>

Alias /awstatsclasses "/usr/share/awstats/lib/"
Alias /awstats-icon/ "/usr/share/awstats/icon/"
Alias /awstatscss "/usr/share/doc/awstats/examples/css"
ScriptAlias /statistics/ /usr/lib/cgi-bin/
With this we are saying that we want to go to the content stored in /usr/lib/cgi-bin where is located AWStats which is a symbolic link.
Now we have to generate statistics for first time:
/usr/lib/cgi-bin/awstats.pl -config=dplinux.net -update
Finally we have to enable CGI module and then we restart Apache:
a2enmod cgi
/etc/init.d/apache2 restart
Now we can read our web site statistics through this address: http://yourdomain.com/statistics/awstats.pl
Potential problems
Error: SiteDomain parameter not defined in your config/domain file. You must edit it for using this version of AWStats:
Check that the config file /etc/awstats/awstats.tudominio.conf have no more parameters than said above.
Icons are not showed:
Try changing the field Alias /icon/ /usr/share/awstats/icon/ byt Alias /awstats-icon/ /usr/share/awstats/icon/ in /etc/apache2/sites-available/default.
4.2. MariaDB databases (MySQL)
Procedure
As root:
apt-get update
apt-get install mariadb-server
Follow the installation wizard.
Explanation
If you want run a complex web site or if you want to serve a CMS, you will need a database manager. One of the most extended databases managers is MySQL, a open source project which was began by Sun Microsystems. Some years ago, Sun was bought by Oracle. That sale did not liked to developers so MySQL was forked. This fork was called MariaDB and over time this implementation has been used increasingly. Nowadays, the most distros offers MySQL and MariaDB but the trend is to abandon MySQL support.
To install MariaDB we have to type these lines as root (2.3. Log in and log out as root):
apt-get update
apt-get install mariadb-server
When we accept all dependencies, the installation will begin. After some minutes, a config program will be executed automatically. There we have to enter the root password for the database. This root user is independent of the system root user:

Then, the installation process will finish so the database system is ready to be used. Now we can manage our databases in two ways: through command line o graphically trough a web browser and phpMyAdmin.
4.2.1. Console management
Procedure
mysql -u root -p
Create a database (into mysql):
create database dplinux;
Show available databases (into mysql):
show databases;
Import database (into system console):
mysql -p -u root db_name < file.sql
Export database (into system console):
mysqldump -u root -ppassword db_name > file.sql
Explicación
From console we can perform all kind of operations and it is very usefull if we want to automate certain task like make a back up periodically.
To create a new database, we hace to type this:
mysql -u root -p
Now we are in out database manager system:

There we have to type this order:
create database dplinux;

To show all available databases, we can type this:
show databases;

To import an existing database, we have to exit from mysql by typing ‘exit’. Then from system console we type this:
mysql -p -u root db_name < file.sql
Now we have to enter the password. It is important that the database must exist before the import operation.
To export a database we type this:
mysqldump -u root -pclave_bd nombre_bd > archivo.sql
Notice that the modifier -p is joined to the password. Using that syntax it is not necessary to enter the password every time we want to export so it is the right way if we want to automatize a process. We just must me sure nobody can read the stored password.
4.2.2. phpMyAdmin management
Procedure
As root:
apt-get update
apt-get install phpmyadmin
Go to http://your_ip/phpmyadmin
Explanation
To manage our databases from a web browser, first of all we have to install phpMyAdmin as root (2.3. Log in and log out as root):
apt-get update
apt-get install phpmyadmin
Accepting all dependencies, the installation finish quickly. During this process, we have to choose our web server:
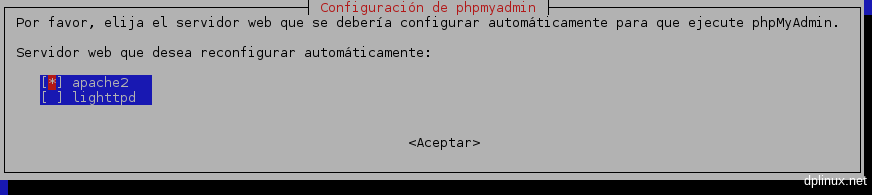
We have to choose ‘apache’. Then we have to accept the installation of a database which is required by phpMyAdmin:

Then, we have to enter our database password for the database root user:

Finally we have to choose a password por phpMyAdmin. It is possible to use the same password we entered in our root user for MariaDB:

Now the installation has finished. We can check if it is working by entering through a web browser to http://your_ip/phpmyadmin
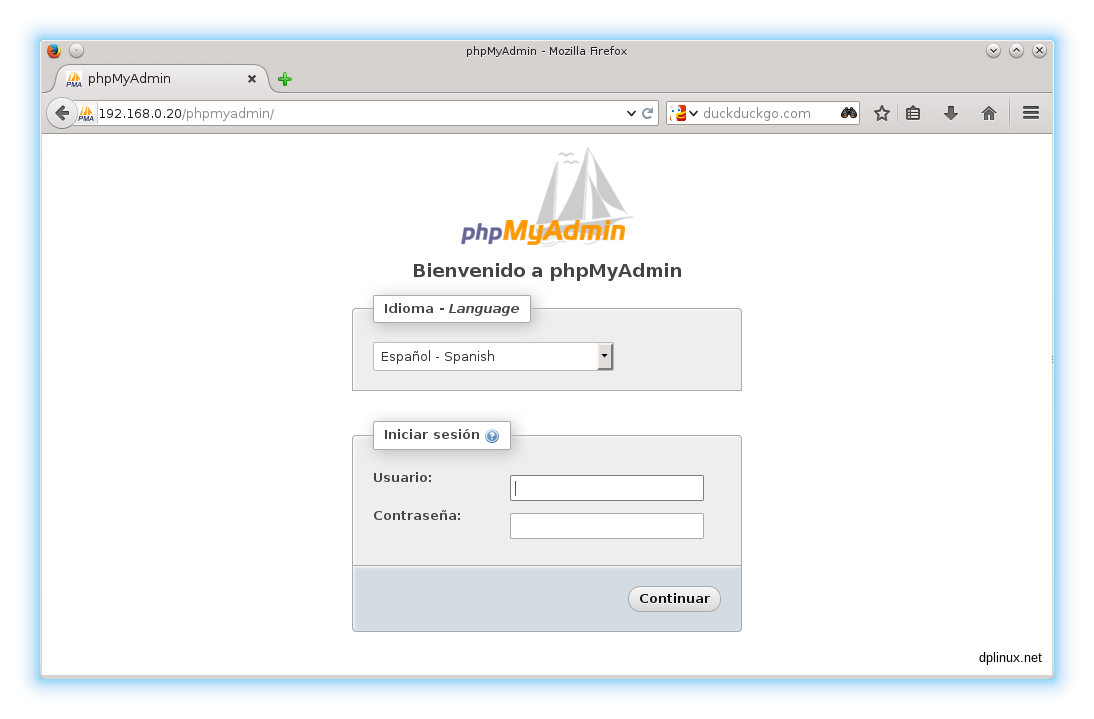
As user we have to enter ‘root’ beside our root password.

Here we can perform all operations we need related with databases stored in out server.
4.3. PHP
Procedure
As root:
apt-get update
apt-get install php5 libapache2-mod-php5 php5-mysql
Explanation
PHP is a interpreted programming language which allows us to generate html documents in function of some variables. We you want to execute PHP code in your server, you have to install the interpreter and Apache’s module. PHP is required to run the majority of CMS developments.
To install PHP you have to run these lines as root (2.3. Log in and log out as root):
apt-get update
apt-get install php5 libapache2-mod-php5 php5-mysql
Now you server is ready to run PHP content.
4.3.1. Increase upload file size limit
Procedure
As root:
nano /etc/php5/apache2/php.ini
Modify the values of these parameters: ‘upload_max_filesize‘ and ‘post_max_size‘.
Explanation
PHP is used for many things. One of those things are file uploading to our server. By default, the file size limit is just 2 Mb so all web applications which use PHP transfer files from a web browser will be limited to this size.
To increase this limit, we have to modify the file php.ini which is stored in /etc/php5/apache2/. To do that, as root (2.3. Log in and log out as root):
nano /etc/php5/apache2/php.ini
Now we have to find ‘upload_max_filesize’ and ‘post_max_size’ parameters. We can use Nano’s search tool by pressing ctrl+w (2.2. Nano text editor operations):

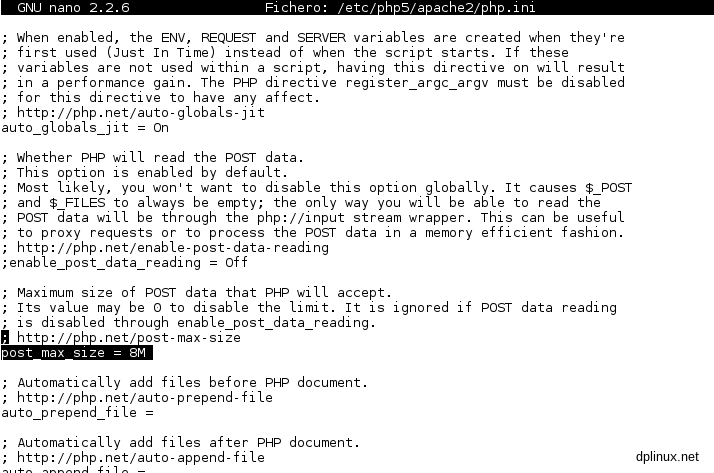
The parameters’ values can by modified as we want. If we want a 2Gb limit, we just have to enter 2048M in both parameters.
Once the changes are saved, we have to restart Apache:
/etc/init.d/apache2 restart
5. CMS install
A CMS (Content management system) is a software package that allows you to create web pages for a particular purpose. You can create a blog, to maintain forums, to have cloud storage and other services.
The typical procedure is to download a CMS, to create a database and follow the installation steps.
5.1. WordPress
Procedure
Install Apache (4.1. Apache web server), PHP (4.3. PHP) and MariaDB (4.2. MariaDB database (MySQL)).
As root :
wget https://es.wordpress.org/wordpress-4.2.2-es_ES.tar.gz
tar xzvf wordpress-4.2.2-es_ES.tar.gz
mv /home/alejandro/wordpress /var/www/html/
chown -R www-data:www-data /var/www/html/wordpress/
Follow all steps from installation wizard in http://your_ip/wordpress
Enable .htaccess file (4.1.3. Enable .htaccess file).
nano /var/www/html/wordpress/.htaccess
Paste this:
<IfModule mod_rewrite.c>
   RewriteEngine On
   RewriteBase /wordpress/
   RewriteRule ^index\.php$ - [L]
   RewriteCond %{REQUEST_FILENAME} !-f
   RewriteCond %{REQUEST_FILENAME} !-d
   RewriteRule . wordpress/index.php [L]
</IfModule>
Explanation
To be done.
5.2. OwnCloud
Procedure
Install Apache (4.1. Apache web server), PHP (4.3. PHP) and MariaDB (4.2. MariaDB database (MySQL)).
As root:
wget https://download.owncloud.org/community/owncloud-8.0.3.tar.bz2
tar xjvf owncloud-8.0.3.tar.bz2
mv /home/alejandro/owncloud /var/www/html/
chown -R www-data:www-data /var/www/html/owncloud/
nano /etc/php5/apache2/php.ini
Add this parameter: always_populate_raw_post_data=-1
apt-get update
apt-get install curl libcurl3 php5-curl php5-gd php5-json php5-intl php5-mcrypt php5-imagick
/etc/init.d/apache2 restart
mysql -u root -p
create database owncloud;
mkdir /home/user/owncloud_data/
chown -R www-data:www-data /home/user/owncloud_data/
Enable .htaccess file (4.1.3. Enable .htaccess file).
It is important to enable a secure link (4.1.5. HTTPS secure web throudht SSL-RSA).
Cofigure ownCloud thourgh http://your_ip/owncloud
Follow the steps from section 4.3.1. Increase upload size limit.
Explanation
To be done.
5.3. Moodle
Procedure
Install Apache (4.1. Apache web server), PHP (4.3. PHP) and MariaDB (4.2. MariaDB database (MySQL)).
As root:
wget https://download.moodle.org/download.php/direct/stable29/moodle-2.9.tgz
tar xzvf moodle-2.9.tgz
mv /home/alejandro/moodle /var/www/html/
chown -R www-data:www-data /var/www/html/moodle/
nano /etc/apache2/sites-available/000-default.conf
You have to create a Directory section into the proper VirtualHost section:
<Directory "/var/www/html/moodle">
   Options Indexes FollowSymLinks MultiViews
   AllowOverride All
   Order allow,deny
   Allow from all
   AcceptPathInfo On
</Directory>
apt-get update
apt-get install php5-xmlrpc php5-intl
/etc/init.d/apache2 restart
mkdir /home/user/moodle_data/
chown -R www-data:www-data /home/use/moodle_data/
Configure it in http://your_ip/moodle
Explanation
To be done.
6. P2P file exchange
To be done.
6.1. BitTorrent (Tansmission)
Procedure
As root:
apt-get update
apt-get install transmission-daemon
/etc/init.d/transmission-daemon stop
nano /etc/transmission-daemon/settings.json
Configure all parameters as you want. It is important to set «rpc-whitelist»: «*»,
/etc/init.d/transmission-daemon start
mkdir /home/user/torrent_data
chown -R debian-transmission:debian-transmission /home/user/torrent_data
Now you have to configure Transmission’s GUI or you can access through a web browser: http://your_ip:9091/transmission
Explanation
To be done.
6.2. eDonkey2000 (aMule)
Procedure
As root:
nano /etc/apt/sources.list
Paste this texto to the end of the text file:
#debian unstable
deb http://ftp.es.debian.org/debian/ unstable main contrib non-free
nano /etc/apt/apt.conf
Paste this:
APT::Default-Release "jessie";
APT::Cache-Limit 150000000;
Apt::Get::Purge;
APT::Clean-Installed;
APT::Get::Fix-Broken;
APT::Get::Fix-Missing;
APT::Get::Show-Upgraded "true";
nano /etc/apt/preferences
Paste this:
Package: *
   Pin: release a=jessie
   Pin-Priority: 900
Package: *
   Pin: release a=unstable
   Pin-Priority: -10
apt-get update
apt-get -t unstable install amule-daemon
amuled
echo -n nuestra_clave | md5sum - | cut -d' ' -f1
nano /home/usuario/.aMule/amule.conf
Set AcceptExternalConnections=1 and ECPassword=clave generada con md5sum
amuled
Now you can user aMuleGUI to manage and configure the aMule client.
Explanation
To be done.
7. Other services
7.1. FTP file transfer service
Procedimiento
As root:
apt-get update
apt-get install proftpd
Follow all steps.
adduser dplinux -shell /bin/false -home /home/ftp_server
nano /etc/proftpd/proftpd.conf
Add this text to the end of file:
<Global>
   RootLogin off
   RequireValidShell off
</Global>

<Anonymous ~ftp>
   User ftp
   Group nogroup
      <Limit LOGIN>
         AllowAll
      </Limit>
   UserAlias anonymous ftp
   DirFakeUser on ftp
   DirFakeGroup on ftp
   RequireValidShell off
   MaxClients 10
      <Directory *>
         <Limit WRITE>
            DenyAll
         </Limit>
      </Directory>
</Anonymous>
Explanation
To be done.
7.2. Email exchanger
To be done
7.2.1. Send email through a Gmain account
Procedure
As root:
dpkg-reconfigure exim4-config
> «mail sent by ‘smarthost’; it is received from SMTP or fetchmail»
> The mail system name is ‘localhost’.
> Left destinations in blank.
> Outgoing email server: smtp.gmail.com::587.
> Next two windows you have to choose «No».
> Maildir
> No
nano /etc/exim4/passwd.client
Add this text to the end of file:
*.google.com:your_account@gmail.com:password
chown root:Debian-exim /etc/exim4/passwd.client
chmod 640 /etc/exim4/passwd.client
update-exim4.conf
invoke-rc.d exim4 restart
Explanation
To be done.
7.2.2. Send mail without Gmail
Procedure
As root:
dpkg-reconfigure exim4-config
> «Internet site; the mail is sent and received by SMTP»
> Mail system name: our domain name (ex: dplinux.net).
> Don’t modify this.
> Add ‘localhost’ to the domain following a semicolon.
> Left in blank the newt two windows.
> No
> Maildir
> No
Explanation
To be done.
7.2.3. Send attached files from console
Procedure
As root:
apt-get update
apt-get install sharutils
To send several atached files, run this:
(uuencode file1 file1 ; uuencode file2 file2; uuencode file3 file3)| mail -s "Asunto" address@mail.com
Explanation
To be done.
7.3. File sharing server (SMB)
Procedure
As root:
apt-get update
apt-get install samba samba-common libcups2
nano /etc/samba/smb.conf
Add and/or modify this:
[global]
   workgroup = WORKGROUP
   server string = Samba Server %v
   netbios name = dplinux.net
   security = user
To share a public folder add this to smb.conf:
[Shared_folder]
   path = /home/samba/shared_folder
   browsable = yes
   writable = yes
   guest ok = yes
   read only = no
To share a private folder:
groupadd samba_group
useradd samba_user -G salba_group
smbpasswd -a samba_user
mkdir -p /home/samba/secure_folder
chmod -R 0770 /home/samba/secure_folder
nano /etc/samba/smb.conf
Add this:
[Secure_folder]
   path = /home/samba/secure_folder
   valid users = @gruposamba
   guest ok = no
   writable = yes
   browsable = yes
Explanation
7.3.1. Public folders (without password)
To be done.
7.3.2. Private folder (with password)
To be done.
8. Server monitoring and management
To be done.
8.1. SSH remote console
To be done.
8.1.1. Graphical execution of graphics (GUI) programs
Procedure
Type the name of the program in a SSH session (ex: pcmanfm) loged out as root (2.3. Log in and log out as root).
Explanation
To be done.
8.1.2. Files and folders management trought FISH
To be done.
8.3. Monitoring with historic (Cacti)
Procedure
Install Apache (4.1. Apache web server), PHP (4.3. PHP) and MariaDB (4.2. MariaDB database (MySQL)).
As root:
apt-get update
apt-get install snmp snmpd rrdtool php5-mysql
wget http://www.cacti.net/downloads/cacti-0.8.8d.tar.gz
tar xvf cacti-0.8.8d.tar.gz
mv /home/user/cacti-0.8.8d /home/user/cacti
mv /home/usuario/cacti /var/www/html/
mysql -u root -p
create database cacti;
cd /var/www/html/cacti
mysql -u root -p cacti < cacti.sql
nano /var/www/html/cacti/include/config.php
Edit all parameters and remove coment characters from $url_path = «/cacti/»;
chown www-data:www-data -R /var/www/html/cacti
nano /etc/crontab
Paste this to the end of the file:
*/5 * * * * www-data php /var/www/html/cacti/poller.php > /dev/null
/etc/init.d/snmpd stop
net-snmp-config --create-snmpv3-user -a 'password' -A MD5 user
nano /usr/share/snmp/snmpd.conf
Add this to the last line:
rouser user
/etc/init.d/snmpd start
Now go to http://your_ip/cacti and configure Cacti. The default username/password are admin/cacti.
Explanation
To be done.
8.4. Real time monitoring (Linux-Dash)
Procedimiento
Install Apache (4.1. Apache web server) and PHP (4.3. PHP).
As root:
apt-get update
apt-get install git curl php5-curl php5-json
cd /var/www/html
git clone https://github.com/afaqurk/linux-dash.git
chown www-data:www-data -R /var/www/html/linux-dash
To enable a password, you can follow all steps from
Para establecer contraseña de acceso seguir las instrucciones del apartado 4.1.6. Password protected web page.
/etc/init.d/apache2 restart
Explanation
To be done.
8.5. Top
To be done
8.6. Apachetop
Procedure
As root:
apt-get update
apt-get install apachetop
apachetop -f /var/log/apache2/access.log -r -T 60
Explanation
To be done.
8.7. Network monitoring (IPTraf)
To be done
8.8. Block access from particular IP addresses
Procedure
As root:
Ban IP:
iptables -A INPUT -s ip -j DROP
iptables-save > /etc/iptables/rules.v4
Unban IP:
iptables -D INPUT -s ip -j DROP
iptables-save > /etc/iptables/rules.v4
Explanation
To be done.
8.9. Suspicious behaviour IP ban (fail2ban)
Procedure
As root:
apt-get update
apt-get install fail2ban
cd /etc/fail2ban
cp jail.conf jail.local
nano jail.local
Set up file.
service fail2ban restart
Explanation
To be done.
9. Referencias
https://wiki.debian.org/es/NetworkConfiguration
https://www.linode.com/docs/websites/apache/apache-2-web-server-on-debian-7-wheezy
http://www.cyberciti.biz/faq/star-stop-restart-apache2-webserver/
https://fuscata.com/kb/set-maxclients-apache-prefork
http://serverfault.com/questions/520195/how-does-servername-and-serveralias-work
http://www.techrepublic.com/blog/smb-technologist/secure-your-apache-server-from-ddos-slowloris-and-dns-injection-attacks/
https://www.digitalocean.com/community/tutorials/how-to-create-a-ssl-certificate-on-apache-for-ubuntu-14-04
https://www.openssl.org/docs/apps/rsa.html
http://www.tecmint.com/install-mariadb-in-debian/
http://www.liquidweb.com/kb/create-a-mysql-database-on-linux-via-command-line/
https://www.howtoforge.com/installing-apache2-with-php5-and-mysql-support-on-debian-wheezy
http://stackoverflow.com/questions/20073676/how-do-i-install-php-curl-on-linux-debian
http://stackoverflow.com/questions/2184513/php-change-the-maximum-upload-file-size
http://www.webupd8.org/2009/12/setting-up-transmission-remote-gui-in.html
https://www.howtoforge.com/tutorial/proftpd-installation-on-debian-and-ubuntu/
https://www.linode.com/docs/email/exim/sendonly-mail-server-with-exim-on-debian-6-squeeze
http://linuxcommando.blogspot.com.es/2014/04/how-to-setup-exim4-on-debian-to-use.html
https://www.howtoforge.com/samba-server-install-on-debian-7-wheezy
http://roger.steneteg.org/blog/installing-cacti-from-source-on-debian/
http://siddou.mynetgear.com/2013/08/install-snmp-client-debian-7-wheezy/
https://www.howtoforge.com/monitor-ubuntu-14.04-debian-wheezy-with-linux-dash
http://laotraboladecristal.com/2014/12/14/apt-pinning-o-como-instalar-paquetes-de-diferentes-ramas-en-debian/
https://www.digitalocean.com/community/tutorials/how-to-protect-ssh-with-fail2ban-on-debian-7
Feel free to leave a comment if you have some doubt.